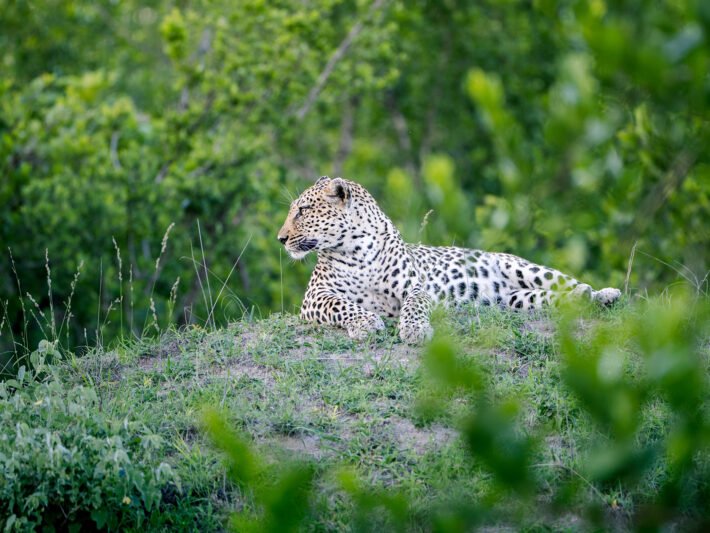
There’s nothing I love more than being behind a camera, pointing it at a majestic leopard as it rests on a sturdy acacia branch, gazing through my lens with piercing orange eyes. This is my happy place. One of the rare moments where I feel fully present, noticing everything around me from the way the sunlight touches her dappled fur or the texture of the gnarled branch on which she’s perched. Details that I’d have otherwise missed are coming to life.
And that’s only part of the joy that photography brings. The moments that we capture on safari are immortalised through our images and videos, allowing the memories to stay with us for the rest of our lives, and enabling the joy that they bring us to be shared with our friends and family or even a wider audience.
I’ve been passionate about photographing wildlife for as long as I can remember. Throughout over a decade of going on safari across Africa, I’ve constantly been improving my craft. Based on this experience, I’m going to share with you some of my favourite practical tips for taking photos you can feel proud of on your safari adventure!
Preparation Makes or Breaks Your Photography
Before you even think about cameras and lenses, it’s important to spend some time building up an idea of what you want to capture. Is there a particular animal you want to focus on? Is there an image you’ve seen online that you feel inspired by and want to take something similar?
I find that doing some research online and creating a mood-board of images that I want to replicate really gives me direction when on safari. Without a clear idea of what you want to capture, you end up taking photos without any intention and these will often feel flat.
For example, if you decide you’d like to take a picture of a herd of elephants walking in a line through a dusty landscape, preparation can give you the best chances of achieving this. For starters, you’ll want to craft a safari itinerary that allows you to be in a park or reserve where there are huge elephant herds and the terrain matches what you’re looking for. A good safari company will be able to advise you here and will likely point you in the direction of Amboseli National Park in Kenya. You’ll then need to have the right equipment to capture the image you want. A wide-angle lens is the best choice for a landscape scene like this. But we’ll talk more about different lenses a little later on!
So use your mood-board to choose the country you want to visit and even the individual national parks and reserves. If it’s leopards you want to focus on then perhaps Sabi Sand in South Africa is best for you. Or if you want to experience variety then maybe a combined Kenya and Tanzania safari is calling your name.
It’s also worth researching if there are any locations that are specifically geared to photographic safaris. Conservancies that border the Maasai Mara, for example, often have vehicles which have been modified specifically for photographers, allowing you some great angles that regular vehicles can’t get.
Choosing the Right Gear for Safari
You’ve now got a pretty good idea on what you’d like to take photos of and perhaps have a wish-list of shots. Now you can think about what equipment can help you achieve the results you want.
In all honesty, the exact camera you use is perhaps the least important part of getting a good photograph. Technology has come on so much that most cameras these days are more than good enough to allow you to take lovely photos. Even our mobile phones are capable of taking fantastic photographs.
But if you don’t have a camera already and would love to invest in one for your safari, my best recommendation for a safari is a mirrorless camera. These are more compact and lighter than traditional DSLR cameras but don’t compromise on results at all. If anything they are more advanced, with faster autofocus.
Within the mirrorless range you have full frame cameras or cameras with crop sensors. Full frame cameras typically have better low-light capabilities and can shoot wider. Cameras with crop sensors are more zoomed in which can be really useful when capturing wildlife that’s far away or for bird photography.
Good full-frame mirrorless cameras include the Canon R5 and Sony A1.
I personally shoot with a Lumix GH7 which has a micro-four-thirds sensor. This camera is specifically designed for video (my passion!) but I’m pretty happy with the photos I can capture with it too. I have never felt restricted by it and feel I haven’t even scratched the surface yet of everything it’s capable of.
The lenses that you purchase are actually much more important than the camera itself. Not only the focal length that you choose but the quality of the lens too (as a general rule, lenses with a lower f number are better).
For a typical safari a 100-500mm lens or similar is perfect as it gives you a wide range. No animal should be too close or too far! Be aware that if you have a camera with a cropped sensor, the lens will have a slightly longer focal length. On a micro-four-thirds camera a 100-500mm is the equivalent of a 200-1000mm.
Prime lenses will give better results than a zoom lens. A prime lens has a fixed focal length and so can’t zoom in and out. These typically have a low f number (we’ll go into what this means in more detail later on) and so can let more light in and have more background blur. The trouble with prime lenses is they are heavy and can be restrictive as they can’t zoom. Therefore I’d only recommend one as a secondary lens. My personal favourite lens is a 200mm (400mm for my micro-four-thirds camera) f2.8.
Camera Settings That Work on Safari
Most modern cameras are able to shoot in ‘auto’ mode which means that the camera will take care of all your settings for you in order to expose the image in a way it deems correct. This is extremely helpful for beginners as it allows you to focus on other factors such as composition whilst the camera takes care of the technical side.
However, there may be instances where you want more flexibility over the image you’re getting and that’s when learning how to use your camera’s settings can be a big help.
There are three key settings that you need to be aware of:
- Aperture: this dictates how much your camera lens opens up and thus how much light is being let in. The lower the f number, the wider the lens and the more light it lets in. Aperture also dictates how much background blur there is and how narrow your focus is. A wider aperture will have a narrower focus and more background blur whereas a smaller aperture will have more in focus and limited blur. Wide apertures (f0 – 4) are therefore good for portraits or low-light conditions whilst small apertures (around f8) are great for landscapes.
- Shutter Speed: this dictates how fast your shutter clicks. The faster the shutter speed, the sharper the image. A fast shutter speed is great for animals in motion where you want to capture every detail. You may choose to have a slower shutter speed if you want to capture motion blur. Lighting conditions will also dictate your shutter speed as the faster the shutter speed, the less light reaches the lens. Therefore in low-light conditions your shutter speed will need to be slower to let more light in.
- ISO: this refers to the camera sensor’s sensitivity to light. By increasing your ISO number you can make your sensor more sensitive and bring more light in. But the downside of this is that a high ISO adds noise to your image. This setting is extremely useful in low-light situations, such as watching a lion hunting at dusk. The good news is that technology is getting so good now that you can remove a lot of this noise in post-processing.
Each of those three settings work in harmony and when shooting in fully manual mode, you are balancing them to get the perfect result. For example, a fast shutter speed requires a wider aperture or a higher ISO to compensate for less light.
Being outdoors, natural lighting is always bright on safari. I therefore have saved custom modes which I use which have the aperture, shutter speed and ISO already set-up perfectly for safari photography.
I always prioritise a fast shutter speed to get sharp, crisp images. Animals are often moving and you don’t know when there may be a burst of action so being ready to capture it is essential. My shutter speed is typically set at 1/2000 (a 2000th of a second). Having these settings in place allowed me to get crisp images of a cheetah family playing during Tanzania safari.
My go-to lens is a 100-400mm f4. I like to keep the aperture as wide as possible (to balance out the fast shutter speed and allow for a lower ISO) so it stays at f4.
To make things even more complex, cameras often have a ‘native ISO’. This is the ISO that they work best on and which produces the best image. This will vary from camera to camera but the cameras I’ve owned have always been either 320 or 400. I will have my ISO set to this number.
If you don’t want to go to fully manual mode, there are modes on the camera where you can be in control of just one setting. Shutter priority puts you in control of shutter speed (TV) and aperture priority allows you to control the aperture (AV). You can also put your camera into auto-ISO mode where it controls its ISO and you control the other settings.
How to Nail Composition on a Game Drive
Often overlooked, I believe composition is the most important part of a photograph. This is the difference between a mediocre image and one that makes you feel awestruck.
It’s so tempting when you find an interesting animal to place it in the centre of the frame, zoom in so it’s taking up most of the frame as a portrait and click. But this leads to a very boring and flat image.
Instead take a look at the entire scene before you click. Is there any interesting feature in the background to include? Which direction is the animal facing? How does the animal fit into the scene? These questions will help you to craft a much more exciting image.
If having an ‘eye’ for composition doesn’t come naturally to you (it really didn’t to me) then don’t worry, there are a few basic ‘rules’ that can help.
The main rule of composition is the rule of thirds. This is that the frame is split into thirds both horizontally and vertically. The idea is that if a subject is placed into one of these thirds or if the landscape is split according to thirds (sky in either one or two thirds of the frame and the land in the other) that the image will be visually appealing. And it sure works!
You can turn on a ‘grid’ in your camera settings that you can have your frame split into thirds and this can help you compose your image better.
Another composition trick I was taught is that if an animal is looking in a particular direction (for example to the left) you want to position the animal to the right of the frame so we can see what the animal is looking at, even if it’s just negative space.
Whilst it’s tempting to always want to be close to your subject and capture portraits, don’t neglect landscapes too. Sometimes showing the subject in its environment can be powerful. For example a cheetah on a termite mound surrounded by nothing but vast open plains can make the viewer see just how huge the savannah is.
Making the Most of Safari Lighting
Lighting can have a profound impact on your images. I’ve learnt this the hard way. On my first safari I took so many washed-out images and at the time I couldn’t understand it. Now I can easily tell when we’re positioned with the 11am sun behind the subject, flushing all colour out the landscape. The sun is so high so you’d think it wouldn’t have an impact. Wrong!
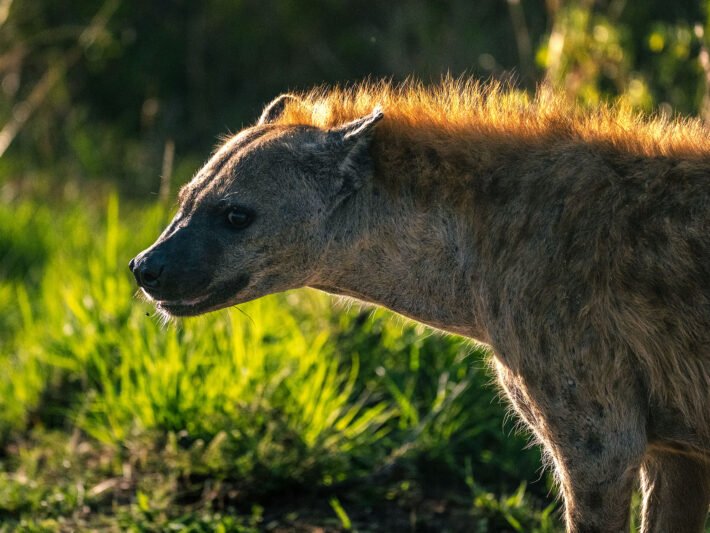
By far the best time to photograph on safari is in the early morning or afternoon. From dawn until around 9am, and then again from 4pm until sunset, the lighting is soft and colours are vibrant. You can really play around with the lighting at this time, including back-lighting (where the subject is illuminated from behind) which provides some of my favourite opportunities.
With this in mind, plan your safari schedule around these times, opting to leave early in the morning, perhaps come back to camp for lunch and then depart again for an evening game drive. Discuss your schedule with your safari tour operator beforehand so they can ensure your guide is aware of your preferences and can plan accordingly.
Light gets very harsh from 10am to 3pm on sunny days, washing out colour from the landscape. This doesn’t mean there are no photographic opportunities, however. If you position yourself with the sun behind you (not the subject!) you can still get some lovely photos. This is a great time to experiment with black and white images too.
Overcast days provide great opportunities to photograph throughout the day in soft light. And stormy skies allow for some fantastic images!
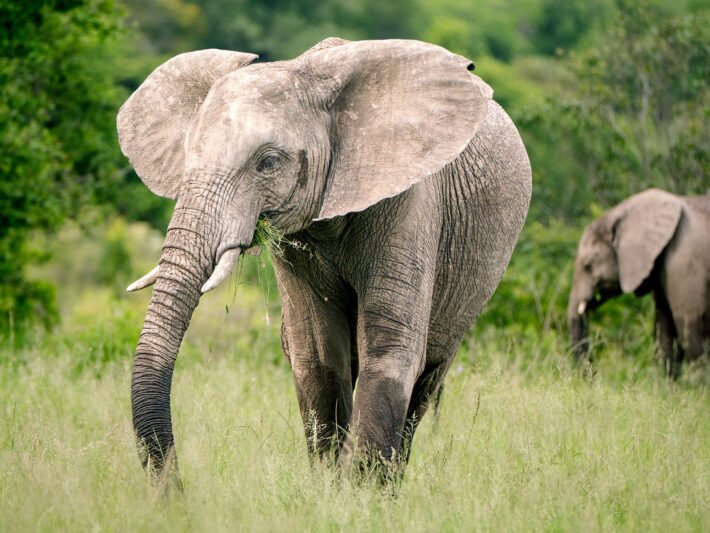
As cloudy days can be great for photographs, it may be worth planning your safari during the rainy season. I embarked on a Kenya safari in March, during the long rains, and the stormy skies have provided me with some of my favourite ever elephant photos.
Practical Tips for Shooting from a Vehicle
When it comes to safari vehicles, you actually have quite a bit of choice and some are better than others for photography.
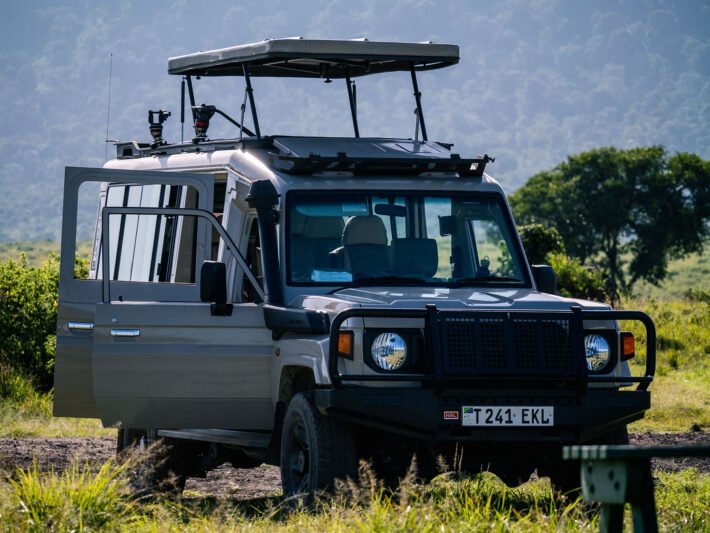
East African safaris often take place in either minibuses or Land Cruisers with pop-up roofs. A pop-up roof provides a panoramic view of the landscape but there are several limitations too. The main is camera angle. Shooting down on your subject creates a rather flat image and makes them look small. Its better instead to get lower down.
Many safari companies in East Africa offer options for Land Cruisers with fully-opening windows. This allows you to take photos from your seat which is significantly lower than the roof. These vehicles often have a bar just below the window too, which allows you to rest your camera on it.
In addition to offering these photography-ready Land Cruisers, safari companies often allow you to hire beanbags from them (at no cost) which allows for great image stabilisation.
Taking things a step further, you can even request that the safari company removes some seats from the vehicle. If there’s just one or two of you, having six seats in the back is excessive and by removing four, you have more room to move around and even lie on the floor of the car.
Vehicles in private conservancies and reserves sometimes have additional modifications such as drop-down sides, allowing you to get even lower down. I’ll never forget the time I was lying on the floor of the Land Cruiser, filming out a drop-down side, eye level with a pride of lions who ended up coming right up to the car to investigate!
Vehicles in Southern Africa are a different style and typically have no doors and are completely open. Sometimes the armrests are designed for camera stabilisation allowing you to shoot from your armrest with ease.
Essential Accessories to Pack
The accessories that you bring on safari are just as important as your camera.
Firstly, you’ll want to make sure you have enough batteries for at least a full day on safari. Whilst most vehicles come with charge ports and most camps have electricity, it’s never guaranteed so it’s best to come prepared. I always travel with at least 3 batteries per camera.
Memory cards are equally important. It’s surprisingly easy to fill up a memory card, especially when you’re being gifted with a stream of incredible sightings. For that reason you’ll want to have at least two memory cards per camera, ideally three so you have a spare in case one corrupts or gets lost. In terms of memory card size, my main memory card is 320GB and my backup is 256GB. These both come with me on every game drive.
You’ll want to backup your footage so that you’re not just relying on one copy. Therefore it’s essential to bring a laptop with you and ideally an external hard drive.
Due to the quantity of footage and photos I take, I have to clear my SD cards at least once per day. I keep one copy of the footage on my laptop and another on an external solid state hard drive. I then take things a step further and actually have a third hard drive, just in case the other fails. It’s essential to always have at least one backup of your footage.
Safaris can get pretty dusty so I always bring some lens cleaning wipes and a spray, as well as an air-blower to blow dust off my lens or even my camera sensor.
Conclusion
Those are my top tips for making the most of a photographic safari in Africa. Remember, the most important part of photography is that you have fun with it. Photography is, at the end of the day, an art and there’s no right way to shoot the scene in front of you. So go out there, experiment, get creative and have fun!